home

the nursery

Yes, nursery! Hence my long blog silence (babies are time-consuming, guys…)

I never felt like I really had a complete “nursery” to post because we didn’t do the whole fancy-crib-with-floofy-bedding pinterest thing. The room was pretty much empty. We aren’t so much into that whole “baby” look and wanted something gender and age neutral that could grow with him and/or his future siblings. I assembled and stained an ikea dresser to use as a changing table and hung some curtains that I’d already bought but never got around to. The changing pad and rocking chair actually didn’t arrive until after he was born, so these were my “pre-baby” photos:

IMG_9461

image

For the next few months it became a space to fold clean laundry and, well, accumulate piles. It’s a small room and I tried to keep furnishings and clutter minimal for when he began toddling and needed a dog-free area, but in the meantime it was just a place to rock him to sleep and change his diaper.

IMG_4410

Oh yeah, diapers. We use cloth and I kept seeing people online ask for cute storage ideas. I tried to remind myself to take updated photos because I think this works really well for our small space.

IMG_4427

Being that our house is pretty small (~1300 sqft give or take) and closet space is at a premium, we decided to have M’s clothes live in the nursery closet. After all, how many hanging clothes does a baby have? We have these nifty built in closets which optimize space but really are best for grown up sized clothing. But inside the doors of the closet? That’s where the party is.

IMG_4418FullSizeRender-9.jpg

Seriously look how colorful and cheery they are! The side closest to the changing table has covers on bottom and nighttime diapers on top.

IMG_4485

The right side has all-in-ones as well as my custom serenity cover, a few I’m keeping NIP for now, and wetbags and flour sack towels on top. All the components are Elfa from the Container Store and hang on the door with a clip so there was no drilling required. they would work on any closet or entry door.

IMG_4504

In the top dresser drawer are the wipes and inserts. Second drawer holds clothes (not pictured because it’s a mess).

IMG_4476

The third drawer has prefolds, fitteds, and pajamas.

IMG_4481

So yeah, I tried pretty much every kind of diaper just to see what would work best for us. The tray on the changing table has eczema cream, a pump bottle of water for the wipes, and coconut oil in a soap dish.

IMG_4412

Oh, uh, and the rest of the room is super cool too. The chair is from Rocker Refined and was a very generous gift from M’s grandmother. The leather waterfall end tables were a local vintage find… I love how they’re relatively childproof but still look inviting and warm. The glass balloons on the ceiling were purchased in Venice on our babymoon and I thought added a nice “Up” touch to the subtle travel theme, as well as a pop of color to possibly the most monochromatic nursery ever.

IMG_4429.jpg

IMG_4502

Behind the rocker is his little starter library which I’m sure will be expanding rapidly.

IMG_4440

The blue settee and hedgehog lamp (both also visible in the pre-baby photos) aren’t quite kid-friendly but we don’t leave him in here alone so they haven’t been an issue yet.

IMG_4461

And just for the sake of blog transparency, this is the other side of the room. Sigh. I’m going to order some bookshelf-style shelving for those stuffed toys and get rid of the gray end tables. The lotus crib thing has never actually been slept in but maybe it will someday. A girl can hope, right?

IMG_4473

So there you have it. Still lots of progress to be made but we’re really enjoying it so far!

IMG_4470

Our home came in the mail! (Part II)

A long time ago, I posted Part I of this series, which chronicled the unusual history and charm of the Sears, Roebuck & Co. Kit Houses. In this post, I’ve compiled some photos from our house and from historical ads as a comparison. Sorry about the ridiculous delay. Life happened and I haven’t had the time to update here, but I still wanted to put the info out there in case it helped anyone.

Our house is a Sears Van Dorn, which was available only in the 1926, 1928, and 1933 catalog (and actually isn’t fully documented on the Sears Archives for some reason). It’s quite similar to the Van Jean and the Puritan— both Dutch Colonial Revival styles. Rosemary Thornton talks a bit about the Van Dorn here. And that’s pretty much all the info/original photos I’ve found. Anyone else out there living in a Van Dorn?

Here are some of the original features we’ve found in ours (as compared to the Arts & Crafts Society’s checklist):

IMG_9160-copy

Stamped lumber- this is basically the only definitive way to tell you have a Sears kit home. Technically some kit homes may not have stamped lumber, either because the buyer chose to locally source materials or because the materials and blueprints were purchased before they were all stamped. Some might have handwritten numbers and some might have nothing. But a huge majority of them do, so it’s a pretty quick and easy way to confirm a suspicion. Each original piece of lumber in the house should be stamped, but the easiest way to check is in the basement (assuming it’s still unfinished). Ours are along the center beam, not around the edges of the basement, so finding them was a little tricky (we also have blown-in insulation so I feared they had been covered up) but I found a note in The Houses that Sears Built that suggested they could face the center of the house instead of the outer walls, and Rosemary was correct!

IMG_9161-copy

Shipping label– As I was searching our basement with a flashlight for the stamped lumber, I noticed something kind of strange. The back/underside of our basement stairs are held together by wood that is clearly different from the rest of the house. I always thought it was just scrap wood from some old crate, but as my flashlight passed, I noticed text on the wood. I had remembered seeing some of these shipping labels on various sites, and even though ours is too far gone to actually read most of the words, I can just barely make out “S. R. & Co” and some of the other text and stylistic features that are clearly the same as other examples.

Catalog number– As you can see above, the catalog number for the Van Dorn is C1234. I have a note that it’s written in grease pencil in the basement but can’t seem to find my photo of it. Will update if I do :/

IMG_7497-copy.png

Blocks of shoe molding– these interesting transitions were designed for unskilled carpenters so that every awkward corner and joint wouldn’t have to be perfect. Instead of many angular cuts, irregular joins all have this detail, which is common throughout Sears homes. Our stairway between the first and second floors uses these blocks, but the basement stairs have a much simpler molding that wouldn’t have required as unusual cuts.

IMG_7500-copy.png

Doors and doorknobs– we have confirmed that one of the Sears hardware options for a house of this year (1928) would have been the Narcissus (below), which is consistent to both interior and exterior doors of the house. Our back patio doors are not original, so if I see another set of these at a salvage yard (fingers and toes crossed it will be a french door set!) I will swap them out and make them all match.

Some hinges and latches– I outlined in this post some of the trials of getting the original bathroom hardware back into shape (and here, some of the dining room). The notable thing about the bathroom fixtures was that, under all the paint and rust, the latches were nickel plated brass, which is noted on the original catalog page (above). We also have all the original ball tipped door hinges, although that isn’t really a defining characteristic of a Sears house– they were very common.

Attic windows– we actually haven’t been up here since we bought the house, but are planning on turning it into living space this spring/summer. One thing I did notice immediately was the original semi-circle mirrors on both sides, which is consistent with the original images in the catalog. We have one basement window and one stairway window that are original as well, but they are less distinctive. These windows don’t prove it is a Sears house, but comparing our house to the catalog sketch, they are a quick reference that helps us match it up.

We have a few other original touches, like the medicine cabinet, hardwood floors, and stairs, but they would be hard to identify vs. a non-kit home from the same era. An interesting note is that our floors do follow the same pattern as the catalog says they should– oak in the living and dining rooms and the entryway, maple in the kitchen and bathroom, and yellow pine everywhere else. When we first moved in I thought it was fascinating that every room, even the bathroom, had hardwoods– but they weren’t all the same. I assumed that they had been changed at some point in the home’s history. But looking back it seems that they are all totally original (except in our 1/2 bath downstairs which was made by combining a coat closet and space for an ice box in the kitchen– the floors in there are clearly different which makes sense since it was a combination of two different rooms)

Do you have a Sears house? Is anything fun still left in original condition? I’d love to see photos!

Cheers,

 v

As a disclaimer,  just because I truly care about the history of this house and want to see how it was originally built, in all its glory, does not make me a professional nor a preservationist. I want to maintain charm in my house but don’t necessarily feel like I need to stick 100% to period for things like furnishings and paint colors. This blog is primarily about our tales of renovating/decorating, and sometimes I don’t choose to go with what’s traditional. I will never take something original OUT of the house, but when it comes to bringing IN new things, sometimes I want to put my own stamp on it since, after all, it is my house. Just in case you stumbled here by Google search and are looking to see a full to-period restoration of a 1928 house, I’m sorry but I can’t promise that. I do mostly shop vintage but sometimes will choose a mid-century or victorian piece to mix in with the deco and dutch colonial stylings of the rest of the house.

Master Bedroom Revisited

It’s been a while since my last progress post… and I’m still working on compiling some info to write the second half of my last post about Sears kit homes. In the meantime, I think two rooms are pretty close to “done”… or at least Phase 1 is nearly complete. Since the last time I wrote about the master bedroom, I have basically completed the outline that I wrote in this initial post.

As a reminder, here’s where it stood at the last update:

giftable@home

We moved our furniture in and I painted the room a cool, oceany blue (Behr #HDC-AC-23 Provence Blue). I installed Ikea’s Ranarp sconces and hung Popchartlab’s “No Sleep Til Breuckelen” print.

giftable@home

I was still waiting for some nice curtains to go on sale and was hoping to DIY the closet drawer pulls to look a little more special without spending thousands replacing all of them (large pulls in three bedrooms would have cost about $5k… nope.)

giftable@home

Since then……

I got those West Elm curtains on sale and hung them on these nifty arrow-end curtain rods from Overstock. I might need to add some backing to keep extra light out, but for now they’re fine. I love the added pattern in this relatively neutral room. M thinks they’re too visually busy.

giftable@home > bedroom revisited

I also spray painted the existing pulls in the closet. It would cost a fortune to actually replace them, so even though the shape is still kind of meh to me, at least now they look enameled and a little more substantial and vintage than the original Ikea brushed stainless look.

giftable@home > bedroom revisited

I used a coat of black spray primer and 3ish coats of black glossy spray. I picked a heavy duty one so that I won’t have to worry about the finish rubbing off (I think it was this Rust-Oleum Professional High Performance Enamel Spray). I love the black-on-white look.

giftable@home > bedroom revisited

Inside the closet pulls are more of the same. I still hate the knobs so they’ll get replaced as soon as I find something I love. Otherwise, faux enameled black it is. The birch interior of the closet bugs me but not enough to break out the stain/paint. At least not right now.

giftable@home > bedroom revisited

I still really really want to add a white and black flokati rug but I can’t get myself to pay that kind of money. Especially in the summer. Especially with a puppy in the house. But one day… maybe. We also still need a full length mirror. Working on it…

giftable@home > bedroom revisited

And in case you’re wondering, M does actually own clothing. He just uses the closet in the guest bedroom.

That’s all for now! Some other progress and more history on Sears homes coming soon!

❤ v

Our home came in the mail! (Part I)

When I tell people that we live in a Sears kit home, I get mixed responses. About 75% of the time it’s a blank stare. A what? Another few will say they have heard of kit homes and know some basic info about them, but the real house geeks– the historians and preservationists and even a few contractors– are floored by this information. Once I mention it, a huge grin appears and they start rattling off facts about how these quality kit homes transformed the market, and what a joy it is to see or work on one in person. This brings a smile to my face as well… I could talk about the history of our house forever. But for the first two groups, here’s a 5 minute history lesson on Sears, Roebuck & Co kit houses.

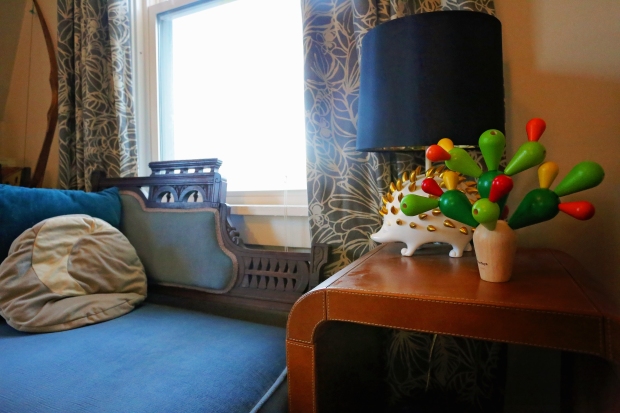
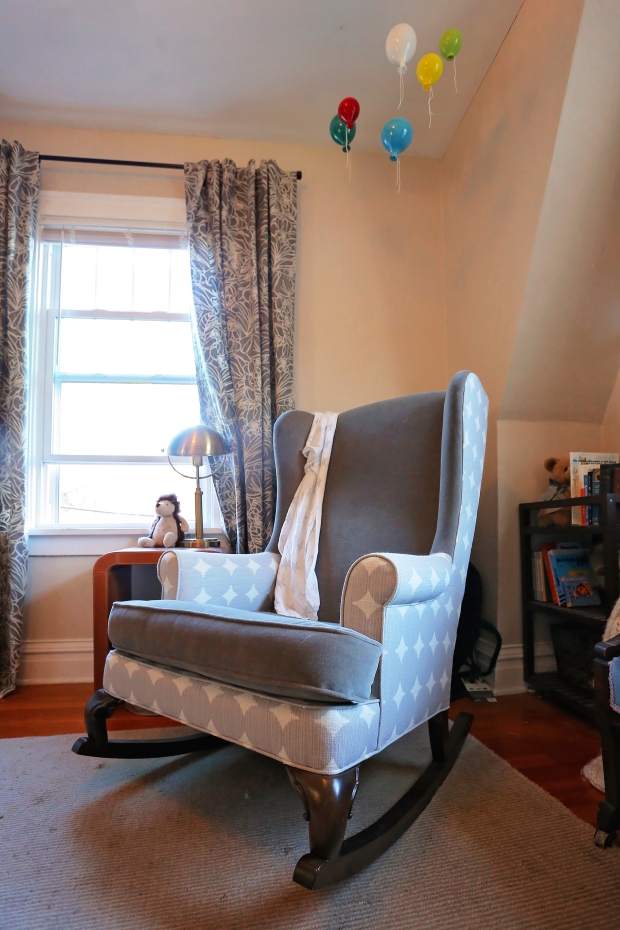
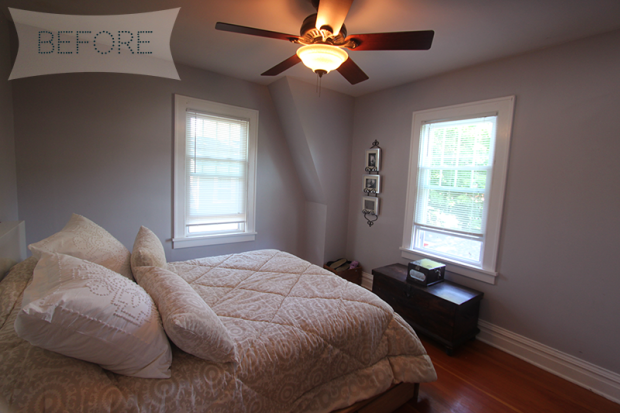
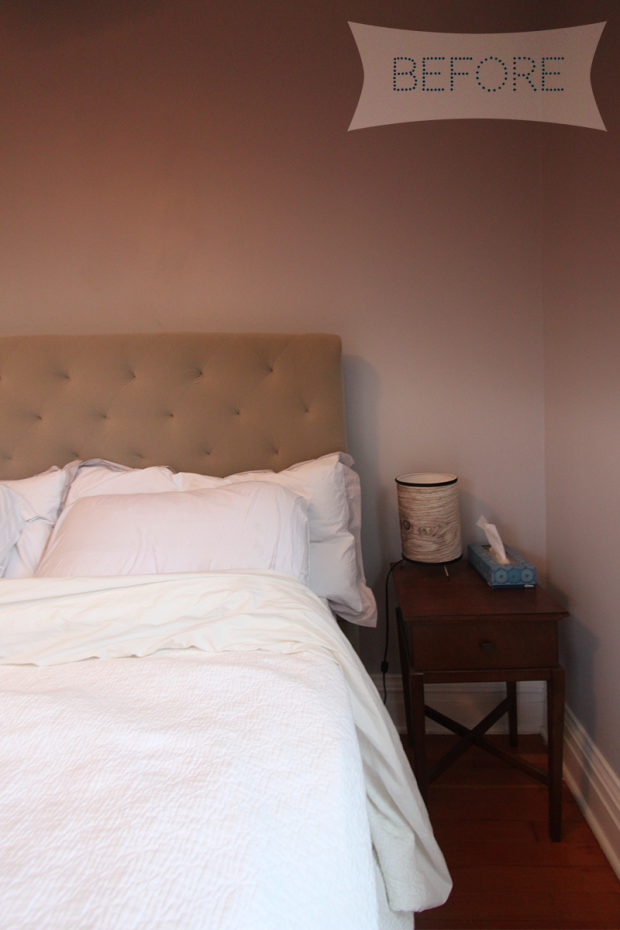
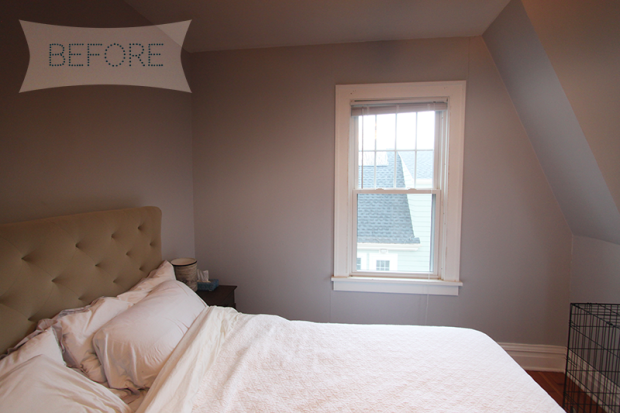
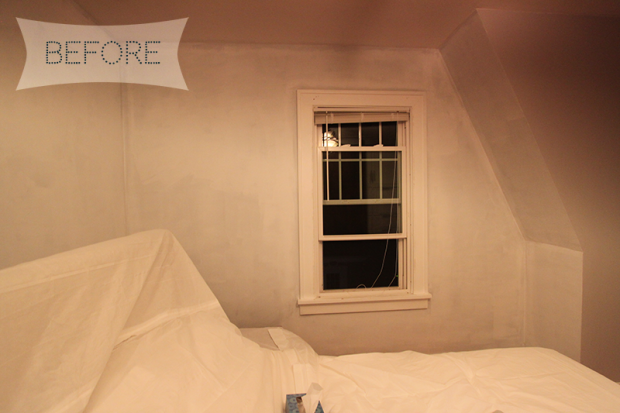
The alternate purpose of this set of posts is for anyone searching for interior original features of kit homes. In my search, I’ve only been able to find three other houses of our model (the Van Dorn), and only two (kind of uninformative) interior photos. Many Sears homes have similar interior features, so maybe by adding ours to the directory I can help someone else who is hoping to restore theirs. I love seeing the interiors of other kit homes– how they’ve changed over the years and what has been kept original, so if you are in the same boat, I’d love to see your photos too!

Anyways, the history of Sears homes… as promised!

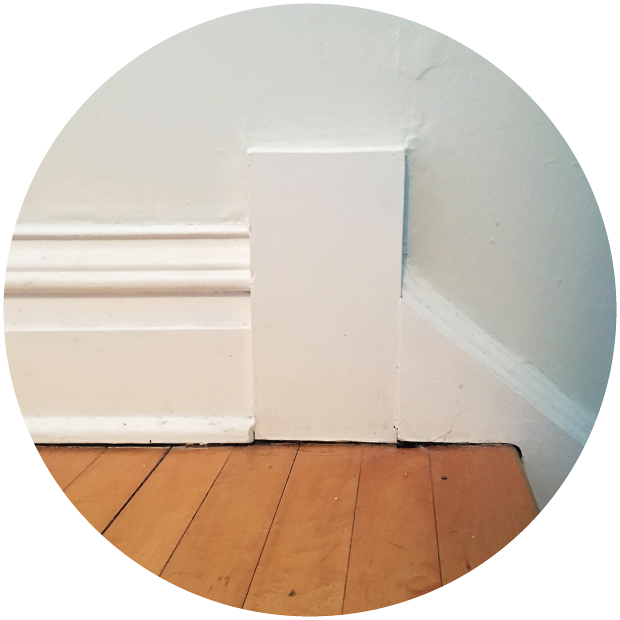
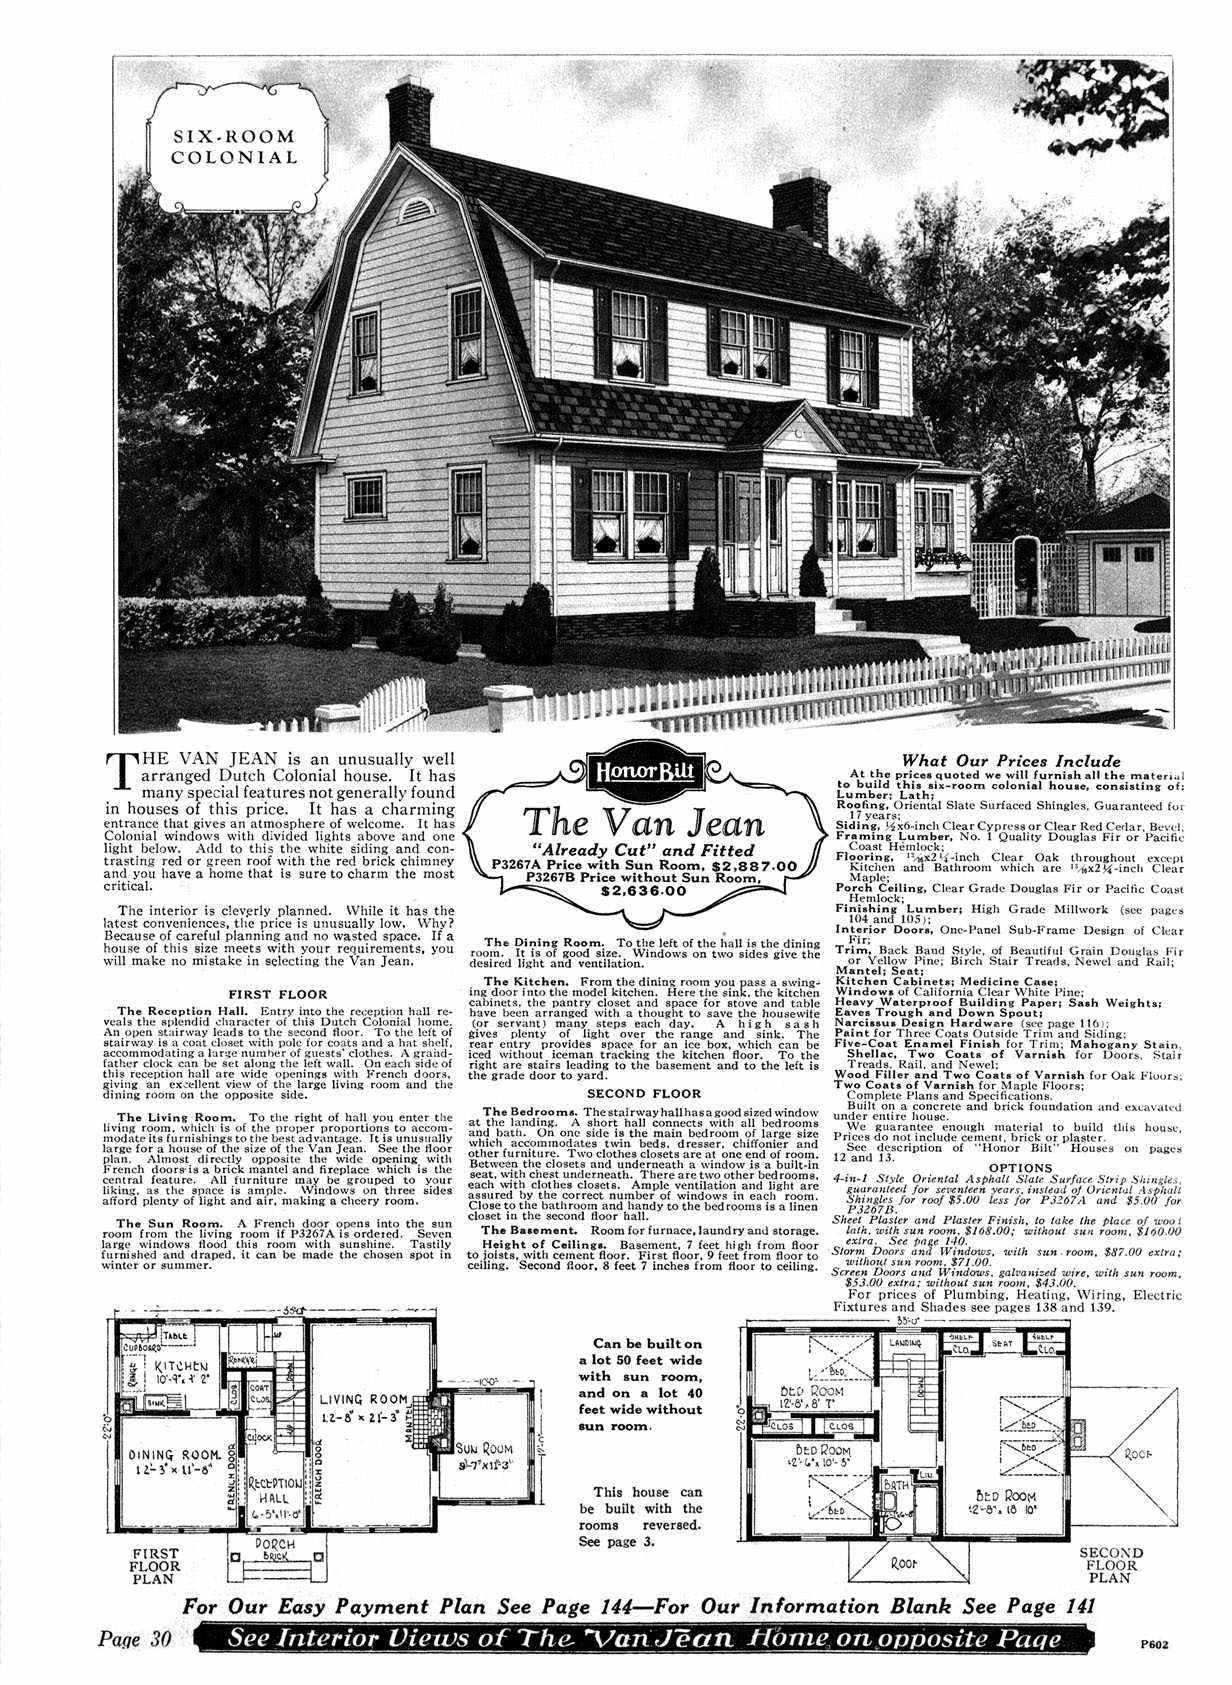
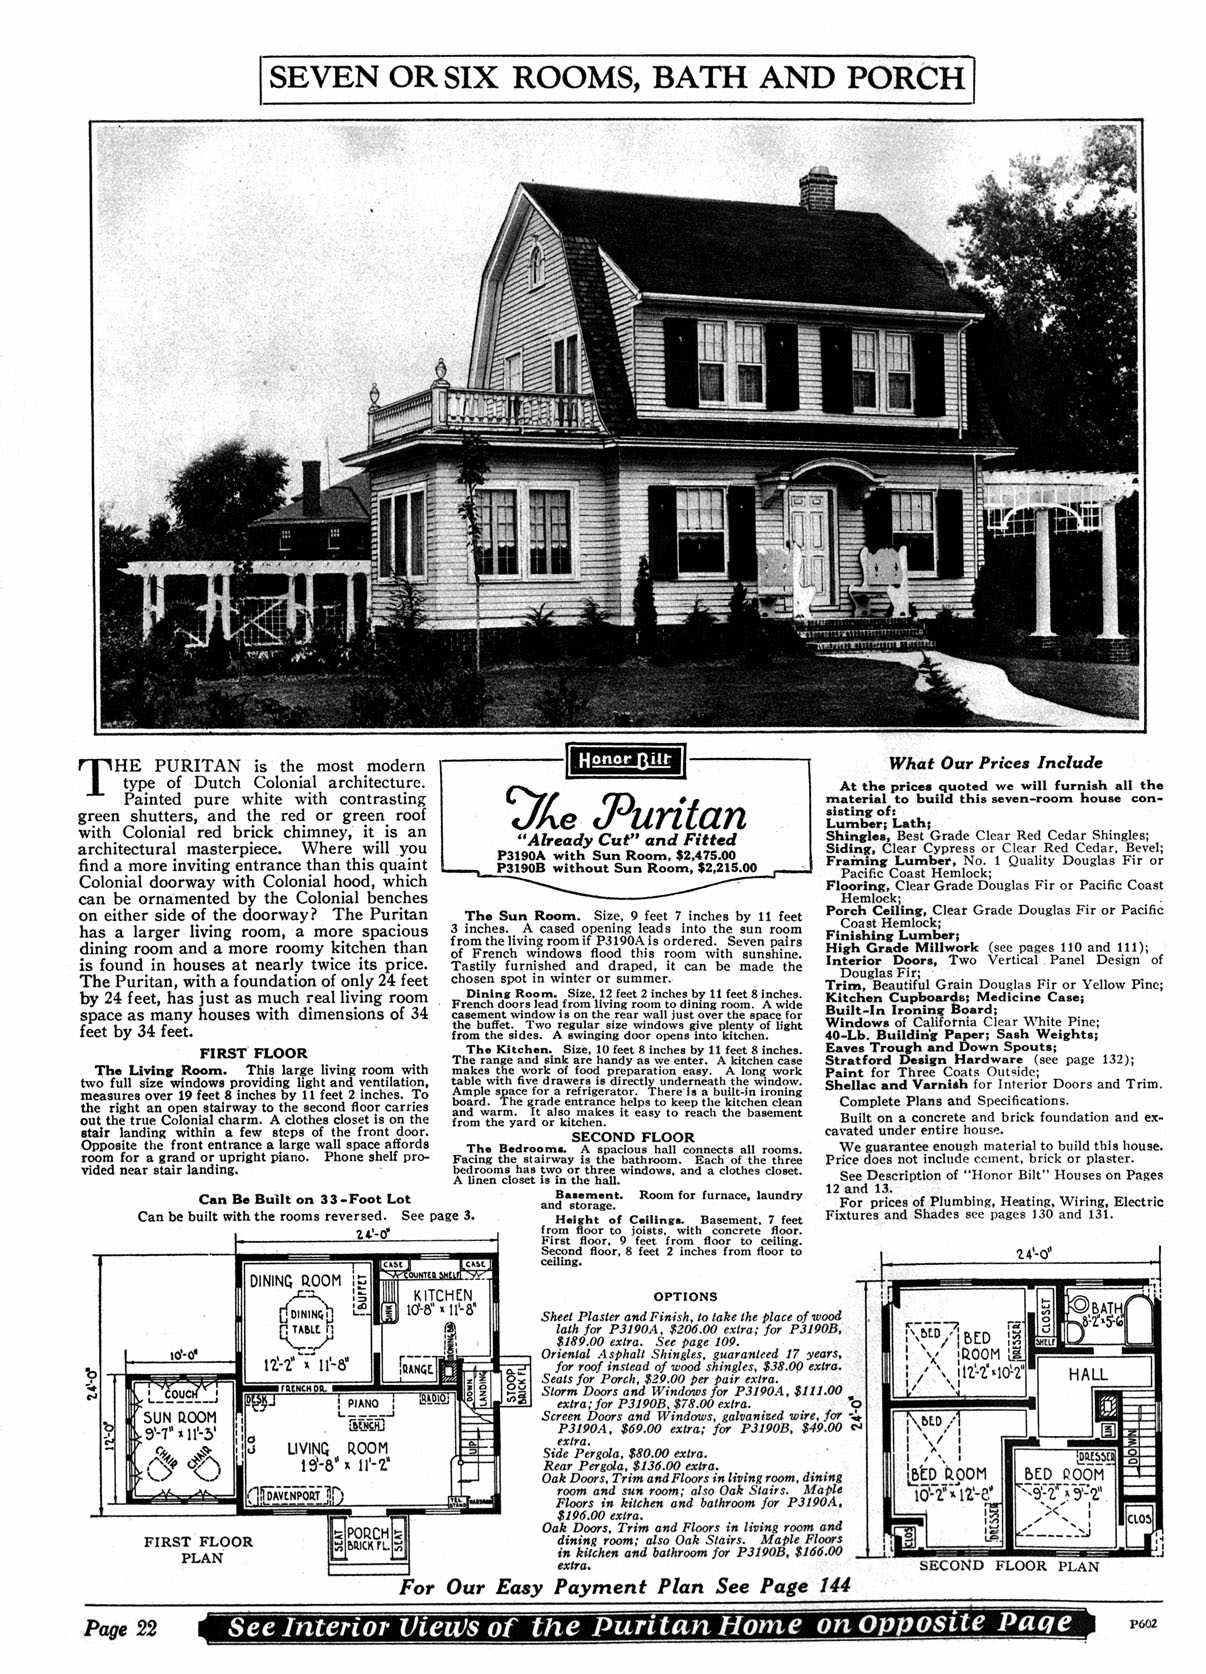
Between 1908 and 1940, Sears, Roebuck & Co. offered 447 (some say 370) different styles of mail order, pre-cut, build-it-yourself kit homes. They sent out regular catalogs and customers could arrange to have an entire house– everything from the plans and lumber to the paint and nails– delivered via rail to their town. Although detailed records were destroyed when the department finally closed, it’s estimated that about 75,000 “Modern Homes” were sold. They’re often compared to Ikea, in that they were to be assembled by the purchaser in small parts from a sheet of directions, but this comparison leaves out the ridiculously high-quality materials that were included with a Sears kit. For example, our 1928 Van Dorn still has the original floors, and not only do they still look brand new, but they actually look higher quality than the hardwood that is put in houses today. Rosemary Thornton explains in The Houses that Sears Built that the location of the company’s Illinois mill was well-positioned for top-of-the-line wood, and their choice to pre-cut allowed them to trim around imperfections and knots to get the most usable wood from each piece. A comparable hardwood floor today would be made from lower quality, newer growth trees. It’s pretty unbelievable for such a behemoth of a company to pay attention to the little details, but they did.

The idea behind the homes wasn’t to revolutionize the style of the quintessential American home. Most catalog styles were appropriate to period (the post-Victorian aesthetic was mainly simple bungalows and colonial revival) but tend to look very similar to architect-built houses, which makes actually identifying a kit house pretty difficult. The Arts & Crafts Society has a quick checklist to identifying Sears kit houses, in case you’re wondering if you’re in possession of one. One of the ideas behind the kit homes was just to sell simple blueprints for stylish homes that “a man of average abilities” could assemble in 90 days. This removed the need for pricey contractors, architects, or carpenters, and took the guesswork out of assembly, while guaranteeing a quality home. Perhaps even more valuable was the way that it enhanced the “American Dream”– not only could a new class of people own a home, but they could pour their own labor into it, making it truly one of a kind and special. Can you even imagine the modern-day liability of telling the “average” person he could build his own house? It definitely wasn’t the world we live in today.

The kind of surprising thing to keep in mind, in contrast to the idea that these were the Ikea of houses, they actually weren’t that inexpensive or basic. At the time, it was a small luxury (depending on the model) to have a house like this sent to you. Ornaments like moldings and millwork were standard in many plans and the materials were extremely high quality. The houses still saved customers many architect and skilled contractor fees, and helped lower income workers with easy payment plans (yes, Sears did pre-FHA private mortgages), allowing many people to buy houses that they wouldn’t been able to afford otherwise, but that didn’t make them slummy or cheap. I’ve traced back the origins of our house, and it was originally built by a large auto shop owner and commissioner of the nearby airport. Not a poor man, but not a millionaire either. Sears offered smaller, simpler cottages as well, but where they actually succeeded the most was bringing new, modern amenities to those outside of big cities. Around the turn of the century, that was water-tight roofs and solid (non-dirt) floors. Then, electricity and indoor plumbing (I love the ad below: Consider the advantages of plumbing in your home! Why, I don’t mind if I do). The Sears architects and designers would also alter any home at no charge, which allowed custom projects like additions, built-ins, and nicer finishes for wealthier clients. They also offered furnishing solutions from the Sears catalog (pretty genius marketing there, huh?)

Sears home parts were pre-cut near Chicago and shipped around the country via rail. So the most common places to find these homes are elsewhere in Illinois, around the midwest, or somewhere along a convenient rail line, usually in suburban or smaller urban neighborhoods that developed between the turn of the century and the 1930s (although many rail lines have been torn out since then, and some houses were shipped by other methods, so there are exceptions). Sometimes, in bustling company-driven towns, an employer would even buy dozens of kit homes and build an entire community for their workforce! I can’t say I’d mind that perk.

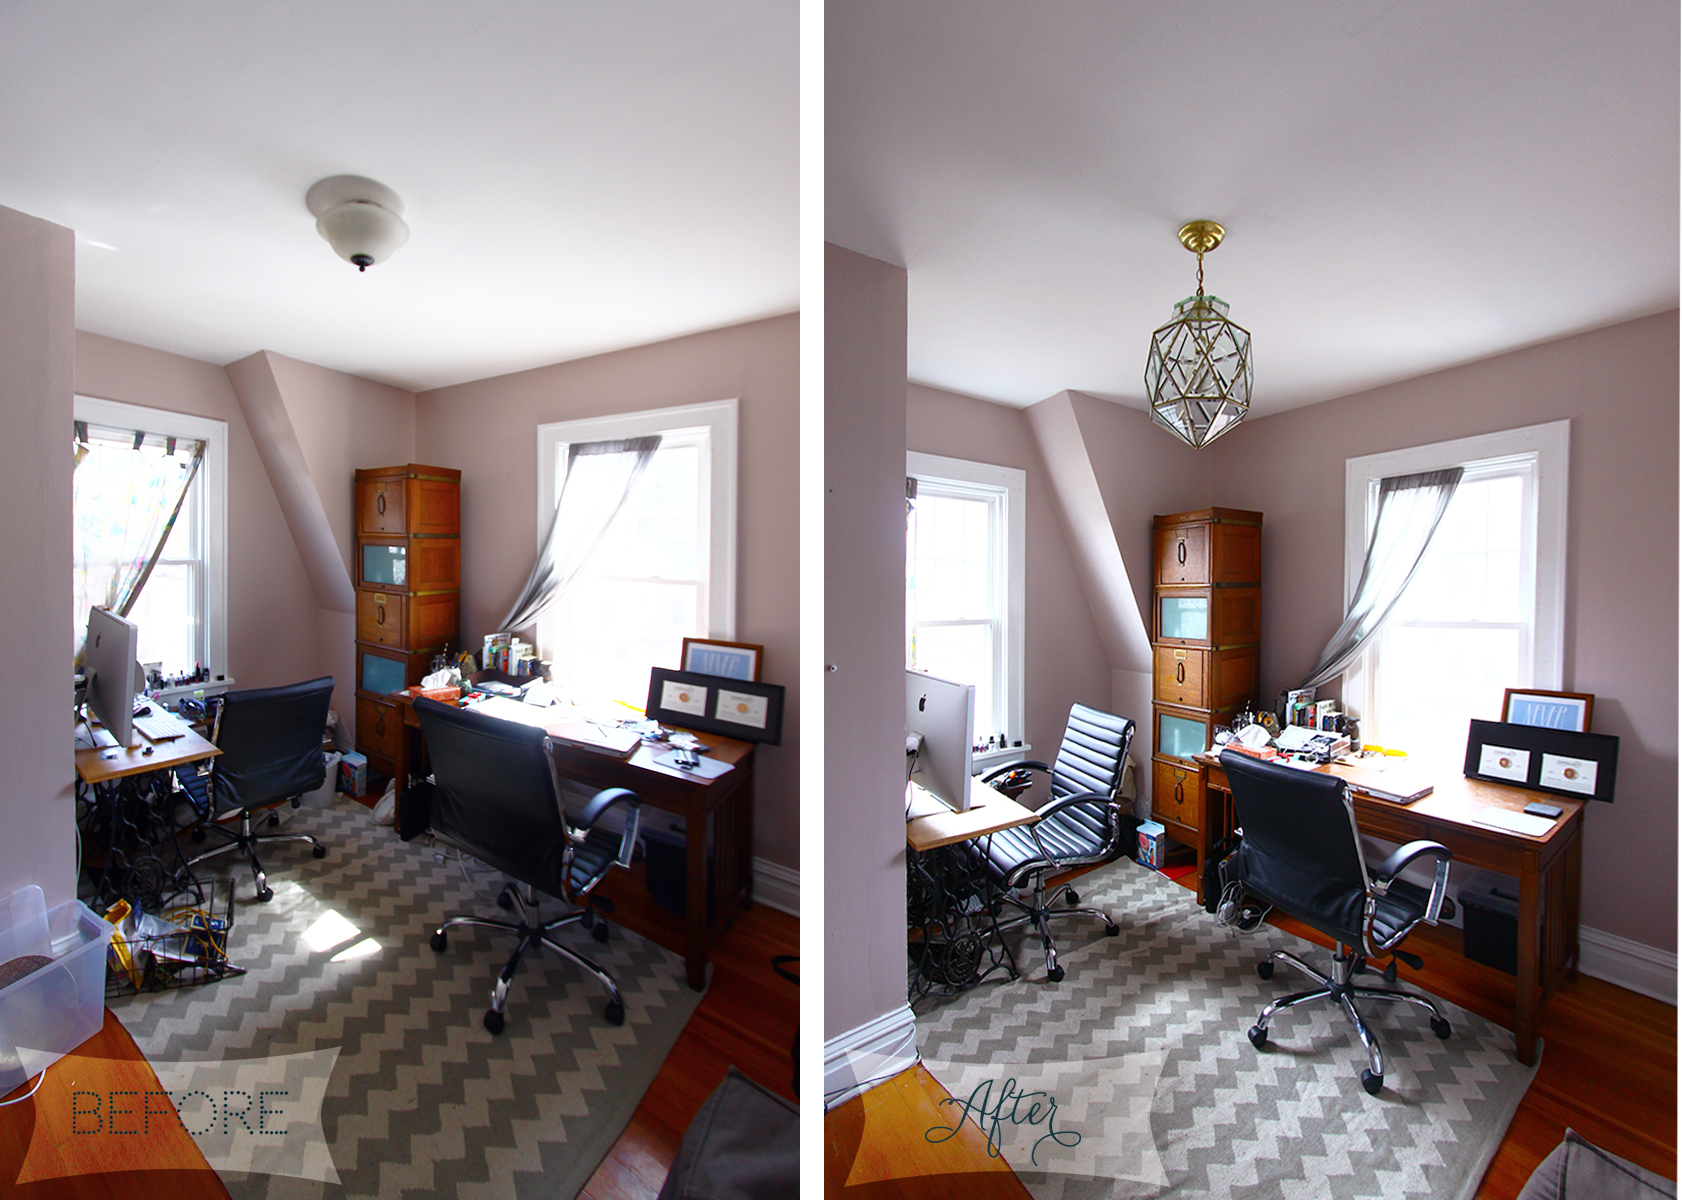
Sears homes could be outfitted with the newest technologies– indoor plumbing, central heat, and electricity. Of course, the earliest models weren’t, and later models could be ordered with or without (with a $23 outhouse being an optional add-on for rural customers). Luxury amenities like this were nice for homebuilders, but are just as nice now. Whereas a slightly older c.1900 Victorian would have been retrofitted with plumbing and electricity (and possibly done shoddily or resulting in a bizarre layout), the “Modern” kit homes still feel perfectly up-to-date with decent wiring and well-planned room flow. Our house still has the original 1928 wiring but we’ve been told by our inspector and a trusted electrician that it currently poses no danger and is still in good shape. [sidenote: a previous owner did update the main electrical box in the basement at some point, and some grounding wires have been put in, but the basic room-to-room wiring is original– cloth covered Greenfield, not knob-and-tube. But those details would depend on the era and who was building the house.] The houses were also built with a drywall product (Goodwall sheet plaster), which was easy to install and inexpensive. When we have contractors in our home, they try to convince me that the house was originally plaster and lathe, because of the age. The TV installer, in particular, assured me that he would need a complicated wiring and mounting rig for the wall-mount, and was shocked when he cut into 80 year old drywall. He tried to cover by claiming it must have been added on recently. Maybe I should send him a book 🙂

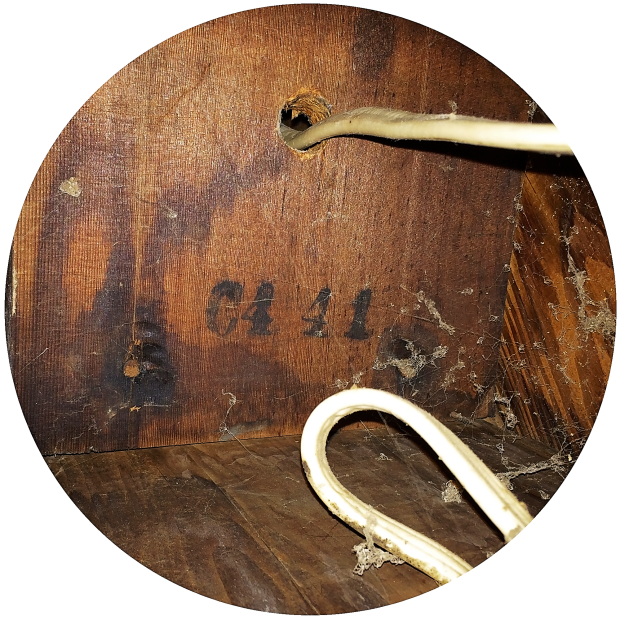
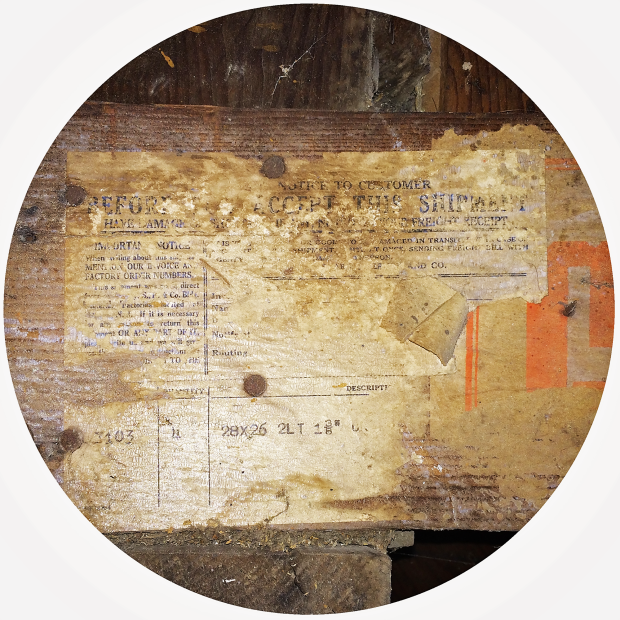
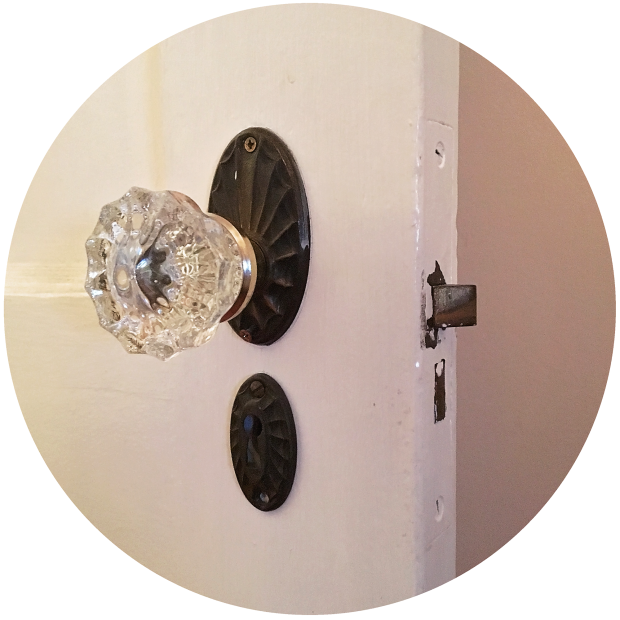
Houses ranged from ~$200-$8,000 and could even be customized or even totally reversed to suit the customer’s preference. So finding your house in an old catalog isn’t always as easy as finding the identical picture. Especially when 100 years of owners have put their own touches, extensions, renovations, and damages on top of it. In the next post I’ll talk about some of the original touches we’ve found helpful in identifying ours, but if you are looking for a more comprehensive guide, check out Houses By Mail.


I can get lost for hours looking at photos online. I can’t post them all here, but for your own searching pleasure, here are my favorite resources:

Daily Bungalow Flickr Page [most of the photos in this post came from here, but since Flickr is so bad about linking directly to an image, I had to grab them and upload them to my Pinterest]

SearsHomes.org 

Sears Archive

The Arts & Crafts Society

In the next post, I’ll compile and write about some photos of the original touches in our house. Do you have a Sears house? Is anything fun still left in original condition? I’d love to see photos!

Cheers,

❤ v

As a disclaimer,  just because I truly care about the history of this house and want to see how it was originally built, in all its glory, does not make me a professional nor a preservationist. I want to maintain charm in my house but don’t necessarily feel like I need to stick 100% to period for things like furnishings and paint colors. This blog is primarily about our tales of renovating/decorating, and sometimes I don’t choose to go with what’s traditional. I will never take something original OUT of the house, but when it comes to bringing IN new things, sometimes I want to put my own stamp on it since, after all, it is my house. Just in case you stumbled here by Google search and are looking to see a full to-period restoration of a 1928 house, I’m sorry but I can’t promise that. I do mostly shop vintage but sometimes will choose a mid-century piece to mix in with the deco and dutch colonial stylings of the rest of the house.

Crazy lamp lady

I’ve always had a fascination with light fixtures that I can’t explain. I love them. Probably more than I love paint or even most furniture. To me, there is nothing more satisfying than changing the way light passes through a room. When we moved in, each room had uninspiring, bland light fixtures, which we started switching out in the last post. But instead of shopping online for the office fixture, this one kind of found me. We had just closed on the house about a week earlier and were browsing one of my favorite salvage stores in Exeter for pulls, knobs, faucets, or anything else that could fit with the vintage-yet-streamlined style of the brand new (to us) place. We popped in next door to Cam’s, a kind of hit-or-miss dusty costume/secondhand/mishmash shop where I’ve found some good deals on vintage art in the past. One of the things I remembered them for was tying old light fixtures up on the ceiling beams, and since I knew we’d need a bunch of them, I wanted to check out my options.

IMG_3813

This fixture was right above the door when we walked in. It was covered in dust and contained a junky plastic candelabra insert. But it was also in perfect condition, solid as a rock, and probably 30lbs. I didn’t know how to re-wire anything, but for this guy I could figure it out. We haggled a price, and then haggled a cash discount (which is funny because I think they’re cash only, but whatever) and the entire purchase came out to $200. Not cheap, but for such a unique fixture, I’ll take it.

From the first time I saw it, I wanted it for the office. I assume that it originally hung in an entryway, but ours isn’t large or grand enough for a hanging pendant like this. M wasn’t so convinced, but I dug up some photos of similar pendants in offices, and he let me be a little insane and go with it. Both of the following images are by Emily Henderson, of course. This whole project screams “what would EH do?”


I actually can’t find any info about this particular pendant online anywhere, so if you have any ideas about where it came from or even when it was made, please let me know.IMG_9107

So I got it home, wiped it down, and totally took it apart. The whole thing needed to be rewired no matter what, so I just took the candelabra piece out and studied how the whole thing pieced together.

IMG_9113IMG_9122


Look how shiny!IMG_9123 copy

I drew out a diagram, measured, browsed youtube for too many hours, and ordered parts.

pendant

For anyone attempting something similar, I got the canopy set and keyless socket from Antique Lamp Supply, the cloth wire from Snake Head Vintage, and the edison bulb and wire nuts from Amazon. Everything else was salvaged from the original pieces.

photo-39

And then I realized the cloth wire I ordered was too large to fit through the rest of the pieces, and re-ordered another gauge. So yeah, this part took a while.

photo-38

I got it to about 90%– everything was connected and in order, but I didn’t really have a plan for how the bulb would hang inside the shade. My idea was a figure-8 knot, which would have looked cool, but I left it partially in pieces so that if I was totally wrong, the electrician who was hanging our other fixtures could have saved us from setting the house on fire.

photo-40 copy


This guy is amazing and actually used to rewire lamps as a kid, so he saw it and instantly knew exactly what he was doing. He didn’t like my figure-8 knot idea… apparently the screws on the socket itself aren’t supposed to hold *any* weight, not even the weight of the bulb. He said the socket had to be connected to the canopy by a threaded rod, which he happened to have in his van. So where you see “cut piece of theaded rod” and “gold cloth covered wire” above in the diagram, he has actually just put a new threaded rod (I thought I could use my dremel to salvage this piece from the candelabra insert, but it was too short– the threaded rod actually goes all the way up into the canopy on the other side of the glass and connects to the loop which holds the chain… super sturdy)


photo-42

So he finished assembling it his (official) way and hung it for me, and dear god it looks AHMAZING.

IMG_9510_sm

Oooo, aah…

IMG_9756_sm

I don’t even really mind the look of the threaded rod, although the knot would have looked way cooler. I think I might wrap some washi tape around it just for a pop of color, but I’m not 100% on that yet.

IMG_9777_sm

This light turned out better than I imagined. This thing went from a total mess to a stunner, and was a quarter the price of anything similar I can find online. Sometimes instead of working I just sit here and stare at it. Maybe that explains the migraines.

IMG_9768_sm

What do you think?

❤ v

Let there be light!

Exciting stuff has been going on here for the past few days. We were both hesitant to bring in any contractors for at least the first few months, just so I could get everything kind of situated and then figure out exactly what needed to be changed and in what order. And I’ve been tackling some quicker projects myself, like painting bathrooms and dining rooms, fixing up the bedroom, and planning some landscaping. But last week we finally brought in two trusted contractors– a carpenter and an electrician. The carpenter, a friend, will be helping out with some more complex projects in a few months, but we put the electrician right to work, changing out four ceiling fixtures throughout the house.

All of the light fixtures that came in the house are OK… most I recognized from the Hampton Bay aisle of Home Depot. Yawn! But some online shopping and three hours later, we’re making progress to eliminate the boring, snooze-worthy fixtures from the house. Obviously nothing in the house was even close to original. I could have gone with reproductions but decided to go with something a little more fun.

IMG_9519_sm

Let’s start in the entryway, which is a really small area with a cluttered coat rack and the smallest bathroom of all time. I would have loved to do an entry chandelier here, but the house honestly probably never had anything grander than a single bulb flush mount. So I grabbed a Restoration Hardware farmhouse light when they were on sale a while back. I wasn’t positive if it would go in the living room, entry, or the top of the stairs, but once we held it up it seemed to be a pretty good fit here. And please excuse the mess, etc… this area still needs a LOT of help.

entryway

The farmhouse looks great, I think… but we also discovered that we’re going to do a lot of paint patching. Why people don’t remove light fixtures when they paint a ceiling, I will never understand. The entryway will all be painted soon, so we’ll just leave it like this for a little while.

IMG_9539_sm

This was also when we discovered that we do indeed have the original 1928 wiring throughout the house (I knew we had it in the bathroom from when I replaced the sconces but wasn’t sure exactly how old it was or if it was safe). The electrician assured me that it was perfectly safe as long as it was in good condition, which it was. He also noticed that the lights all had grounding wires running from the switches, which means someone was paying attention when they started making improvements.

photo-37

The next light was the bathroom. I had already switched out the sconces and painted, so as a reminder here was the lower part of the room:

IMG_8444-2IMG_9317

You can’t even tell in the photos how bad this light is. But finding a replacement wasn’t easy– the switch in the bathroom only controls the sconces, so the new fixture had to have a pull cord that reached from the ceiling without knocking into/damaging the shade.

IMG_9338_sm

I wanted to get a matching porcelain one to the sconces but couldn’t find one with a pull cord, and those can’t be custom ordered. My alternate idea was to get a vintage cut crystal pendant, but again the Etsy shopowner said he couldn’t add the cord. I had to custom order this one in oil rubbed bronze from Rejuvenation, but they kind of screwed it up and without our wonderful electrician would have never been able to get it working ourselves. And honestly, now that it’s up, I’m not so sure about it. I think I need to spraypaint the inside of the shade white to make it look more like the porcelain sconces– it’s just super harsh and bright right now. I also might just order a new shade… we’ll see. At least it’s better than it was.

IMG_9562_sm

IMG_9566_sm

And finally… the super fun one! When we first saw the house, it had a decent looking pendant in the dining room. Not my style but kinda cute. During negotiations, the seller asked if he could take this light with him, and since we had planned on probably replacing it anyway, just let him have it. He ended up installing another light when he moved out– I guess this was what was there when he bought the house a year earlier. And while it was nice having some type of light in the dining room (as opposed to him just leaving a hole in the ceiling), there is NO way this one was going to stay. Is it the worst thing ever? No. But for such a central room, I knew we needed to do something special in here.

dining room

I came across Stimulight on Etsy and held out for a few months before finally biting the bullet and ordering one. And then it sat in the box for a few months because I knew I couldn’t do it myself. I actually probably would have attempted the other fixtures on my own if I hadn’t known I’d had to call an electrician for this one, but that turned out to be a blessing because I would have been on the floor, crying, wrapped in electrical tape and bruises if I’d tried to do any of this myself. Even the electrician left the house punctured and bleeding. This is a tough fixture to hang! It looks AMAZING though, and even though we knew we would have a dining table under it (and could therefore hang it a little lower than usual since nobody can walk into it), we decided to hang it a little on the high side so that it wouldn’t compete with the french doors  and built-in for visual interest. I think it’s absolutely perfect for this room– I can’t imagine anything better.

IMG_9557IMG_9554_sm

The final light was for the office, and I didn’t know if we would actually get around to ever doing this one. I’m going to write a full post about it, so I’ll save the photos for next time.

That’s all for now! I’m super excited to have broken the barrier of welcoming in a professional… maybe this renovation will be easier than the last one after all.

Cheers,

❤ v

[insert backyard pun here]

I’ve been thinking a lot recently about landscaping. Which is weird coming from a person who previously would have called a sidewalk planter with a tree stump and a few rotting cabbages “nature.” But I guess being a homeowner and getting excited about seeing our front and back yards thaw and blossom has changed my perception.

We always talked about wanting a garden. Not anything we could totally live off, but maybe a few fresh veggies we could clip right before dinner. I always imagine wearing a white apron and channeling Martha while doing this, although I’m sure it would actually be sneaking around the house in my pajamas hoping the neighbors don’t see, and then turning around and seeing that the dog has eaten all the tomatoes. But it’s worth a try.

The tough thing about gardening is that you have to start thinking about it while there is still multiple feet of snow on the ground. Some seeds take 8-12 weeks before they’re ready to be transplanted outside, so the garden needs to be planned and supplies ordered in February. At least that’s what it seems… I wouldn’t take my gardening advice on anything at this point. IANAG. Anyways, our biggest concern was keeping our future seedlings away from the dog. She has been digging up the previous owners’ garden since she came home with us, so we knew we couldn’t just plant things in the backyard like normal people. Luckily we do have a south facing front yard that she can’t access, so we’re going to try and keep edible plants in window boxes and flowers in the ground around the front walkway. I’m sure we’ll get other peoples’ kids/dogs running through so I don’t know what will survive here, but it’s all we’ve got right now.

Eventually we might fence off a garden area of the backyard, but for now, we’re only working with the front. Since our front yard currently looks like this:

giftable@home

…I had to reference a photo from when we first saw the house (October). I honestly don’t even remember it ever looking this green and lush.

landscaping

So here’s the current plan:


-trim down the front hedges

build and install two window boxes for the bottom front windows, and plant any edible sprouts

-extend pavers to make room for lounge furniture (and, uh, buy lounge furniture…)
-refinish shutters (they are in worse condition than they look)
-add a carport?


-plant wildflowers and maybe some tall grasses facing the street

-since the front yard is southfacing, this would be a place where we could work during the day and get maximum sunlight. We might eventually add a front fence, just for some added privacy. But that definitely won’t happen for at least a year or two. You know, once we already have a fully matured garden and Martha is begging to come over for dinner. Then we’ll talk about a retaining wall or a tasteful fence to keep the riffraff out.

We already have seedlings planted– a few types of flowers, mint, tomatoes, strawberries, chives, and lettuce. All from Johnny’s, as were all our seed-starting supplies. I’m hoping to have the window boxes complete by mid-May to replant them outside.

————-

Meanwhile, here’s what we’re thinking for the backyard. I already shared this post about inspiration for the back deck as part of the dining inspiration, but I think I’m starting to prepare to actually do some of it. As a reminder (mostly to myself, but also to you) here is what the yard used to look like before we bought it, and before it was covered in multiple feet of pure ice:

giftable@home giftable@home

-add a small fenced portion for future years’ gardens, probably about 2/3 of the depth of the garage (see above)-build a bonfire area, hopefully with a built-in pizza oven and seating

-add string lights to the deck– need to add height, similar to this tutorial

And to prove that we actually have made progress since that Dining Inspiration post, I don’t think we need to do that retractable awning. Sunlight isn’t really a problem, with all the large trees and north orientation. I think it would be more trouble than it’s worth. And we did receive a very nice patio heater from M’s mother, so I can mentally check that off our list (thanks Patty!). I also ordered some outdoor dining furniture and the string lights, so I’m not lying when I say it’s all coming together! Well, I might still be lying a little bit.

Cheers!

❤ v

Master Bedroom Progress… for the love of Ranarp

Weirdly enough, the tiny master bedroom of this house is probably the reason we ended up buying it. Not because of the super bland color palate, normal-sized windows, or annoying sloped ceiling, but because of the closet. We had given up the house hunt for the winter (our lease had a clause that we couldn’t move out from Nov-Mar) but I was still curiously opening my Zillow emails, just to see what was out there. Most of the photos of this house made it seem modest and quaint, but not super special.

IMG_8446

But a photo of the corner of the gorgeously done master closet really made me take notice that someone had truly put some effort in, so I dragged M to the open house (even though he wasn’t interested when I showed him the listing). Sure enough, we left in silent agreement that it was the one. Not because of the closet, but because of all the other little touches, the layout, the neighborhood, and the feeling of relaxation we got while inside.

IMG_8447

(For the record, that’s a sliding barn door… the top bar pulls down to eye-level, and there are 12 drawers and another cabinet on the left side that you can’t really see in this picture. All the drawers quiet close. All extremely unusual for a 1928 Sears kit house that is otherwise mostly well-maintained yet original.)

IMG_8450

If this closet hadn’t been there, or even if it hadn’t made it into the top 10 photos, we probably never would have ever stepped foot here, and yet here we are.

IMG_9006

Anyways, ramblings aside, I didn’t expect to do much in here. The closet is great, even though I would like to take all the pulls off and spray paint them to look enameled… but that’s it. We just moved in our furniture and ignored it.

IMG_9004

Then while M was out one evening, I made a snap decision and broke out the primer. Our headboard is kind of sage-grey-beige and I hated how it clashed with the lavender-gray-blah walls.

IMG_9009

I had already grabbed a paint chip of Behr’s #HDC-AC-23 Provence Blue and knew it was the way to go. It’s a little on the dark side, but it’s still coastal looking and light, and it made the white trim pop. Two days later, I had primed and painted two coats. We put the bed back where it belongs and, once again, I thought it was done.

IMG_9012

And then a few weeks later we brought home a Ranarp floor lamp from Ikea for the living room. It’s really perfect for a house like this– visually light yet not bland, a little unusual, and with antique touches like the black and white braided cord. When I saw that there was a sconce in the collection too (and that it was $20!), I added it to the ever-growing list and eventually picked up two while we were visiting M’s parents in Virginia a few weeks ago. I also ordered this “No Sleep ‘Til Breuckelen” print which combines M’s love of weird maps and the history of New York with our house’s Dutch roots. I think the wall needs two other pieces to flank the print… it’s a bit too small right now.

IMG_9384

The Ranarp sconces were ridiculously easy to install, even though everyone’s favorite blue-and-yellow store fails to package them with screws or anchors. Luckily I had some extras and the whole project only took about an hour.

IMG_9387

IMG_9372

I absolutely love the detail in these sconces! Good job Ikea!

IMG_9363IMG_9379

The only thing that’s left in here is to spray paint those cabinet pulls a black gloss and order the curtains. I’m waiting for West Elm to run a sale…. pretty please?

IMG_9382

Anyways, I love the room and the journey it’s taken so far. What do you think?

Cheers,

❤ v

Bathroom Progress!

We’ve been in the house for about two months and the first room I’ve really tackled (aside from a quick paint job) is the bathroom. I outlined in this post some of the issues and inspiration, and I mostly kept to what I’ve posted so far.

Here is what the bathroom looked like during our initial walkthrough:

IMG_8444-2IMG_8442

And right after move-in:

IMG_9179 IMG_9185

And here is what it looks like today:

IMG_9315IMG_9346 IMG_9320

Obviously the biggest change is the paint color. It took a coat of Kilz Low-VOC primer and two coats of Behr “Watery” (#HDC-CT-26) on the walls, and a coat of Behr “Snowfall” (#W-F-600) on the wainscoting. The color is lovely and really removed a lot of the caveyness from the room.

IMG_9317

After the first coat of primer, it wasn’t looking too pretty (sorry for color balance… removing the two sconces left me with only one (very warm) bulb in the whole room, and I’m not smart enough to take pictures during daylight hours). You can also see in the photo below that the door frame was actually never painted, just either stained white or covered with a very thin coat of cheap paint. It bugged me from the moment we moved in, so getting to the point where I was painting it was such a relief.

IMG_9193

Anyways, primer. I should have used a second coat, but I was scraping the bottom of this can (literally) and, being the great planner that I am, had no way to get more for at least a week. So I just let it dry overnight and went ahead with paint.
IMG_9190

I also removed every single piece of hardware– towel bars, hooks, ring, pulls, hinges, latches, etc– and patched those holes. None of the (ugly) nickel stuff was in a good spot, so the replacement pieces will all be in different locations. Might as well start off with a clean slate, right?

IMG_9331

The rusty, paint-covered old hardware was another fun project.

IMG_5413IMG_8729

I don’t want to say that I’m channeling Nicole Curtis, but I do believe that if the hardware has lasted in this house for 90 years, there is no reason it isn’t good enough to stay for another 90. I soaked everything in baking soda and hot water, but what resulted was not what I’d hoped. Instead of being a beautiful polished brass like the hinges in the dining room, the hardware was all rusted out and appeared to have been chrome plated at some point, but now was just a rusty mess.

IMG_5436

I sanded them all the way down and found something I’ve never seen before– the latch part was solid brass while the base was steel. Nifty! And even though part of me just wanted to leave it there, the other part really wanted a matching bathroom, so I covered the brass parts with painters tape and sprayed the rest oil rubbed bronze. The hinges were in various amounts of disrepair and were mixed… some nickel, some brass. So I sprayed them all to match. I didn’t really want to alter anything original, but considering half of this stuff definitely isn’t (one of them is broken, two are stainless, two are brass), the least I could do is make it all match and move on (reproduction or even salvaged replacement stuff is expensive!). Meanwhile, I ordered some bronze and ceramic pulls from Restoration Hardware for the bottom half of the linen closet to match.

IMG_5527IMG_9327

Once the old hardware was removed and the necessary holes were patched, I went around all the wainscoting with a sharp blade to cut away the dried, torn old caulk. I don’t know what happened in this room or when the wainscoting was installed (definitely not original) but I was just happy to see no visible water damage or mold when I peeled back the boards, and so I cleaned it up, tacked it down with a few extra nails, and recaulked. A few days later, I added a new coat of paint, and now it looks so fresh and clean.

IMG_9329

The tub is still a work in progress. We haven’t had any contractors at all in the house yet, so I have no idea what we will eventually do here or really what our options are. So in the meantime I replaced the plastic tension rod with an ORB curved one (to match and give us more space) and ordered a tension caddy for storage. If and when we tile, we’ll replace the tension caddy with wall mounted shelving and maybe replace the shower curtain with a glass door.

IMG_9346

The bath cart is Ikea’s Raskog, and the new sconces are from Rejuvenation. New overhead light is coming from them as well– it needed to be custom made because of the pull cord. The ceramic plate cover is from them too– I bought one for the light switch below the right sconce but of course it doesn’t fit so I need to cut down the wainscoting (or just spraypaint the existing plastic one… we’ll see).

IMG_9317

And of course the new furniture, which was restored from it’s previous home in a washed up doily B&B

IMG_9335

The total cost of everything so far is around $500. Not bad, eh? Most of that is light fixtures… those things are pricey! There is still plenty to do (like re-hanging the towel rods, changing out the pocket door hardware, installing the ceiling light…) but it’s progress at least!

Cheers,

❤ v

New Old Furniture

One of my initial conundrums was filling the awkward spot next to the bathtub with something other than an Expedit (photo of previous owner’s set-up)

IMG_8442

I briefly looked around at hook/shelf combinations but really thought we needed closed storage space for things like toilet paper and extra tissues, candles, shampoo, etc. But I didn’t want to spend much since the humidity in the bathroom is usually bad news for furniture. I couldn’t believe when I had the opportunity to walk through an old hotel that had closed and buy a few pieces at bargain-basement prices from the new owner. One piece was actually a TV stand, but it had the right dimensions and closed shelving, so I offered $30 and was accepted!

IMG_4062

One thing I didn’t check while measuring was the actual condition of the unit. The lighting was dark and I was rushing around from room to room. When I got it home, I left it in the garage for a few weeks before actually inspecting it.

IMG_5175

The condition was pretty appalling. Most of the other pieces from this trek are in wonderful condition considering their age and heavy use, but this one did not have that luck. Aside from being absolutely disgustingly filthy (below is the pile of paper towels used from just trying to clean it with oil soap), the large cabinet had been painted and other parts had been badly patched and stapled back together.

IMG_4884

IMG_5191

The large cabinet had also been (badly) painted kelly green at some point in the distant past.

IMG_5186

But it was still a solid wood piece of furniture, and still a good price. It just meant I had to paint it– something I kind of hate doing to (mostly) unpainted antiques, but there was no way to clean this up.

IMG_5193

I sanded it down, removed all the hardware, and spray primed (I covered the cute wooden wheels in painters tape for this step). I used the leftover navy paint from the dining room built-in project (Behr Nocturne Blue #HDC-CL-28)– it took three good coats to be totally solid. I also painted the insides of the drawers…. figured the only way to get it really truly clean was to coat it in paint after drenching it in soap (and then adding liners for good measure).

So much better already!

IMG_5229

For the pulls, I wanted to match the style of the furniture, and the bathroom, but also be a little bit playful. Since the piece is so dark, I opted for brass instead of oil rubbed bronze (or cut glass, which was another option and already exists in other parts of the house). I wanted it to be a little bit regency, a little bit MCM, and a little bit deco/colonial. The pulls are from Lee Valley and the knobs from Anthropologie. I love them both.

IMG_5496

If you’re wondering about the original hardware, it was 100% crap. Two of the pieces broke as I was (gently) removing them. They are like aluminum foil thickness and also not very nice looking. Out you go! (intact ones will get donated to the ReStore in case someone else needs a replacement or something). The brass hinges and door catch are original, though… just cleaned with some sandpaper and steel wool.

And just for fun, here’s the final cost breakdown:

Vintage TV stand: $30
Two drawer pulls (Leather Hardware from Lee Valley): $21
Three knobs (Streamline Knob from Anthro): $18
Paint (Behr #HDC-CL-28 leftover from the Dining Room): $0
Total: $69.00

So there you have it! I love it, do you?

Full-room photos coming soon.

❤ v