bedroom

Master Bedroom Revisited

It’s been a while since my last progress post… and I’m still working on compiling some info to write the second half of my last post about Sears kit homes. In the meantime, I think two rooms are pretty close to “done”… or at least Phase 1 is nearly complete. Since the last time I wrote about the master bedroom, I have basically completed the outline that I wrote in this initial post.

As a reminder, here’s where it stood at the last update:

giftable@home

We moved our furniture in and I painted the room a cool, oceany blue (Behr #HDC-AC-23 Provence Blue). I installed Ikea’s Ranarp sconces and hung Popchartlab’s “No Sleep Til Breuckelen” print.

giftable@home

I was still waiting for some nice curtains to go on sale and was hoping to DIY the closet drawer pulls to look a little more special without spending thousands replacing all of them (large pulls in three bedrooms would have cost about $5k… nope.)

giftable@home

Since then……

I got those West Elm curtains on sale and hung them on these nifty arrow-end curtain rods from Overstock. I might need to add some backing to keep extra light out, but for now they’re fine. I love the added pattern in this relatively neutral room. M thinks they’re too visually busy.

giftable@home > bedroom revisited

I also spray painted the existing pulls in the closet. It would cost a fortune to actually replace them, so even though the shape is still kind of meh to me, at least now they look enameled and a little more substantial and vintage than the original Ikea brushed stainless look.

giftable@home > bedroom revisited

I used a coat of black spray primer and 3ish coats of black glossy spray. I picked a heavy duty one so that I won’t have to worry about the finish rubbing off (I think it was this Rust-Oleum Professional High Performance Enamel Spray). I love the black-on-white look.

giftable@home > bedroom revisited

Inside the closet pulls are more of the same. I still hate the knobs so they’ll get replaced as soon as I find something I love. Otherwise, faux enameled black it is. The birch interior of the closet bugs me but not enough to break out the stain/paint. At least not right now.

giftable@home > bedroom revisited

I still really really want to add a white and black flokati rug but I can’t get myself to pay that kind of money. Especially in the summer. Especially with a puppy in the house. But one day… maybe. We also still need a full length mirror. Working on it…

giftable@home > bedroom revisited

And in case you’re wondering, M does actually own clothing. He just uses the closet in the guest bedroom.

That’s all for now! Some other progress and more history on Sears homes coming soon!

❤ v

Master Bedroom Progress… for the love of Ranarp

Weirdly enough, the tiny master bedroom of this house is probably the reason we ended up buying it. Not because of the super bland color palate, normal-sized windows, or annoying sloped ceiling, but because of the closet. We had given up the house hunt for the winter (our lease had a clause that we couldn’t move out from Nov-Mar) but I was still curiously opening my Zillow emails, just to see what was out there. Most of the photos of this house made it seem modest and quaint, but not super special.

IMG_8446

But a photo of the corner of the gorgeously done master closet really made me take notice that someone had truly put some effort in, so I dragged M to the open house (even though he wasn’t interested when I showed him the listing). Sure enough, we left in silent agreement that it was the one. Not because of the closet, but because of all the other little touches, the layout, the neighborhood, and the feeling of relaxation we got while inside.

IMG_8447

(For the record, that’s a sliding barn door… the top bar pulls down to eye-level, and there are 12 drawers and another cabinet on the left side that you can’t really see in this picture. All the drawers quiet close. All extremely unusual for a 1928 Sears kit house that is otherwise mostly well-maintained yet original.)

IMG_8450

If this closet hadn’t been there, or even if it hadn’t made it into the top 10 photos, we probably never would have ever stepped foot here, and yet here we are.

IMG_9006

Anyways, ramblings aside, I didn’t expect to do much in here. The closet is great, even though I would like to take all the pulls off and spray paint them to look enameled… but that’s it. We just moved in our furniture and ignored it.

IMG_9004

Then while M was out one evening, I made a snap decision and broke out the primer. Our headboard is kind of sage-grey-beige and I hated how it clashed with the lavender-gray-blah walls.

IMG_9009

I had already grabbed a paint chip of Behr’s #HDC-AC-23 Provence Blue and knew it was the way to go. It’s a little on the dark side, but it’s still coastal looking and light, and it made the white trim pop. Two days later, I had primed and painted two coats. We put the bed back where it belongs and, once again, I thought it was done.

IMG_9012

And then a few weeks later we brought home a Ranarp floor lamp from Ikea for the living room. It’s really perfect for a house like this– visually light yet not bland, a little unusual, and with antique touches like the black and white braided cord. When I saw that there was a sconce in the collection too (and that it was $20!), I added it to the ever-growing list and eventually picked up two while we were visiting M’s parents in Virginia a few weeks ago. I also ordered this “No Sleep ‘Til Breuckelen” print which combines M’s love of weird maps and the history of New York with our house’s Dutch roots. I think the wall needs two other pieces to flank the print… it’s a bit too small right now.

IMG_9384

The Ranarp sconces were ridiculously easy to install, even though everyone’s favorite blue-and-yellow store fails to package them with screws or anchors. Luckily I had some extras and the whole project only took about an hour.

IMG_9387

IMG_9372

I absolutely love the detail in these sconces! Good job Ikea!

IMG_9363IMG_9379

The only thing that’s left in here is to spray paint those cabinet pulls a black gloss and order the curtains. I’m waiting for West Elm to run a sale…. pretty please?

IMG_9382

Anyways, I love the room and the journey it’s taken so far. What do you think?

Cheers,

❤ v

Master Bedroom Inspiration Board

One of the reasons I initially dragged M to this open house was this closet. In older houses, closet space is like gold, and most of what’s out there looks more suited to a torture chamber than a nice home. Sure, we could add Elfa components like we did in Sutton, but the fact that these closets were already rehabbed meant that a previous owner had put some extra time and thought into their living arrangement, so I convinced him it was worth a look. (Previous owner’s belongings in photos below)

IMG_8446

IMG_8447

Skip forward three months and we still love the master closet. The sliding barn door is so much more space efficient than having a door that swings out into the (small) room, and the combination of double rods and lots of drawers means we can actually share a closet without mangling each other’s belongings (when the door is closed, there are two more rows of tall drawers). The rest of the room kind of lays itself out. If you don’t want to block a window, you have to put the bed exactly where they did, and for us the dog crate fills the remainder of the room, where the previous owners kept a small dresser.

But the room still felt kind of un-homey, so here’s what I’m thinking for customizing and warming it up it a little:

bedroom2

1. Paint it blue! This is basically my default for any bedroom. We had a red brick bedroom years ago and, while it was very nice for about a month, began to drive us crazy. It just wasn’t calming and made both of us feel anxious– something that you don’t really need in the bedroom. This ocean-y shade (Behr Provence Blue #HDC-AC-23) is a bit darker than our Sutton bedroom, but the idea is the same.

2. Add a tufted headboard! Actually, this one is kind of fake since we already have this headboard from Overstock. If you’re considering ordering it, beware– it really needs to be on a carpeted surface or else it won’t stay steady (lots of creaking and cracking in both rooms we’ve put it in). We also replaced the flimsy slats that the mattress sits on with a solid piece of plywood from Home Depot. (photo is of the similar Grid Tufted Headboard from West Elm)

3. Fun curtains! You can’t really tell in the photo above, but this room is the only one in the house to come with built in blinds. They’re the cheapy kind but still do the job. Kinda. Lots of light gets through which is normally ok, but I always like to have the option to darken a bedroom (other migraine sufferers will understand this plight), and I can’t resist adding a nice pattern to a simple room. These dotted chevron curtains are from West Elm.

4. A mirror! Normally, the place for this would be inside the closet door… but that doesn’t work in this space. This one from CB2 is ok, but I might keep my eye out for something vintage instead.

5. Reading lights! We have an outlet behind the bed, so I thought these Ikea sconces would be the perfect custom-looking additions. No need for any electrical work, but the bottoms of the cords will still be hidden by the bedside tables and the bed itself. With a super low-wattage bulb, M will be able to read in bed without me yelling at him. I hope.

6. Custom drawer pulls! As much as I love our custom full-wall closet, I hate the pulls. Between all three bedrooms, there are nearly three dozen massive ugly Ikea pulls and knobs. Since part of my goal is to bring this house back to it’s 1928 glory, brushed stainless modern pulls are not going to suffice. But pulls this large are fantastically expensive– the ones in the bedroom are 7″ and 16″ center to center, and most decent looking pulls that size are in the $50-200 range. That’s ~$2000-7000 to replace something most people won’t even notice. Yeah, no thanks. So this past weekend I tested spray painting one of the extra SNEJD pulls with black Krylon Duo, to try and give it a powder coated look. It’s actually pretty sweet. The black-on-white look is becoming a theme (this room is right next to the bathroom) and is an easy, nearly free, weekend project.

7. Artwork! As a (former) screenprinter, I love putting handmade work anywhere that I can. Especially epic handmade work from a studio in Brooklyn that embraces M’s love of New York’s Dutch past (oh hey, we live in a Dutch Colonial, isn’t that cute?). I first saw this Pop Chart Lab piece in Anna’s bathroom over at Door Sixteen, and snagged one of the last remaining ones on their Etsy page.

I’m liking this mood board thing and might do a few more for other rooms, but I promise we’re making actual progress and I’ll have updated photos soon. Yay!

❤ v

Sutton Renovation Close-up: Bedroom

The first version of this post was originally posted in August 2011 on the giftable designs blog.


Because it isn’t just as easy as picking out a color and waiting for the “after” photos, I’m going to start outlining each room, the process of design and renovation, and finally what I would change (or wouldn’t) if given the chance. I’m going to upload a ton of pictures with little descriptions, but if you just want the final run-down (or the finished pictures!), scroll to the bottom.

Room number three! Yay!

I think the bedroom may have been the easiest room for us to agree on from the start. We had been living in a 100+ year old tenement apartment for 3 years, and as much as I loved the character of the exposed brick, we were sick of having such warm colors in the bedroom (it’s not very relaxing!). We wanted the bedroom to be soothing and calm with a beach cottage vibe, and an edge. The one reference point we kept coming back to was our favorite hang-out, the Ale House Inn in Portsmouth, NH. Whenever we manage to get away from the city and up to the Seacoast, we love to just sit and relax in the tranquil and beautiful, yet modern hotel rooms. So basically, all the work has been done for us. All we needed was to find a beachy blue for the walls and inject our personal style into the details….

Blah, too much talking. Look… pictures!


We got the room cleared out, and then used it mostly for storage of the construction materials. We decided to have our crew refinish all the floors in the apartment, except these, because M likes wall-to-wall carpet in the bedroom. So, unlike the 100-step-process of all the other rooms, the bedroom only needed:

The walls sanded and painted.

Elfa components installed in both closets.

The electrical outlets grounded.

New moulding.

The whole shebang on the windows and A/C unit. (discussed below)

Carpet

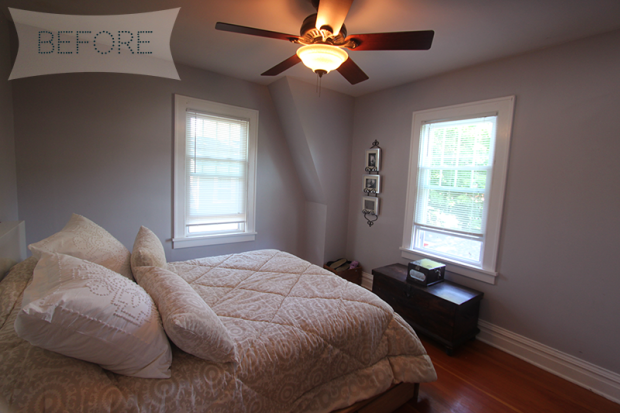
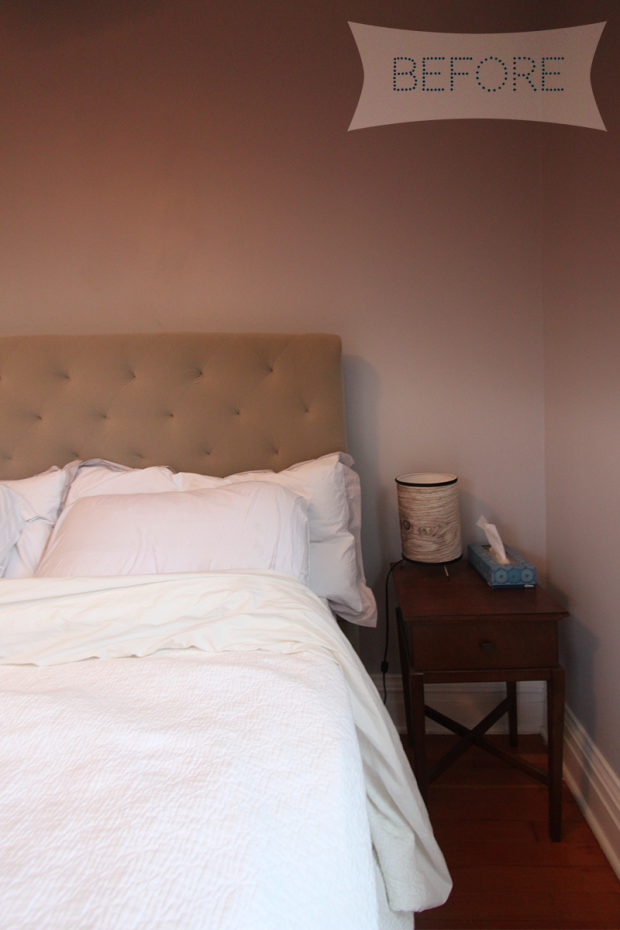
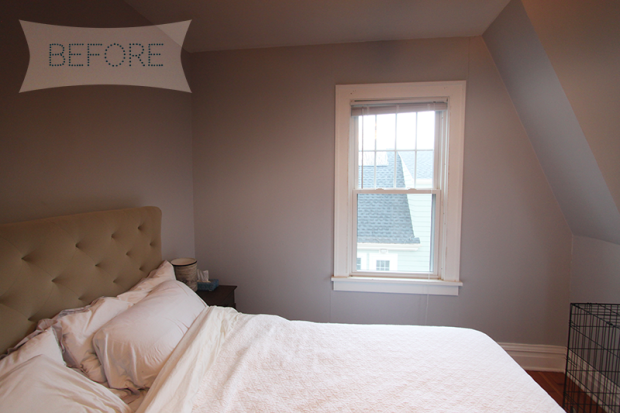
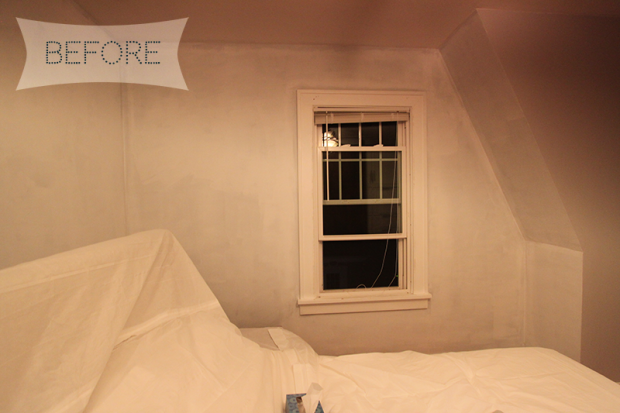
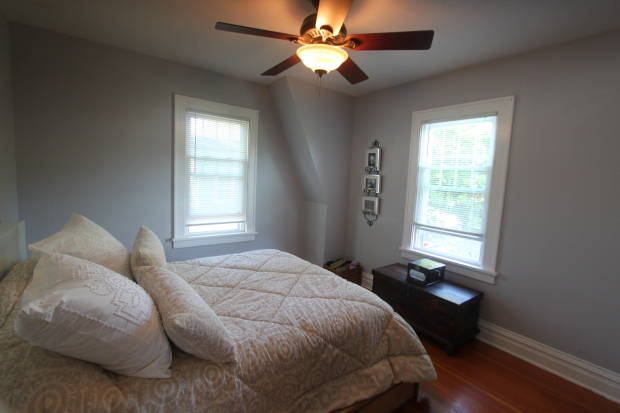
The first thing they did was paint. You can see our original paint color below, on the right (on the wall with the windows). It was ok but felt like maybe we were preparing for a baby boy and not two twenty-somethings. We switched to the color you see on the left, which felt a lot more subdued and nautical.

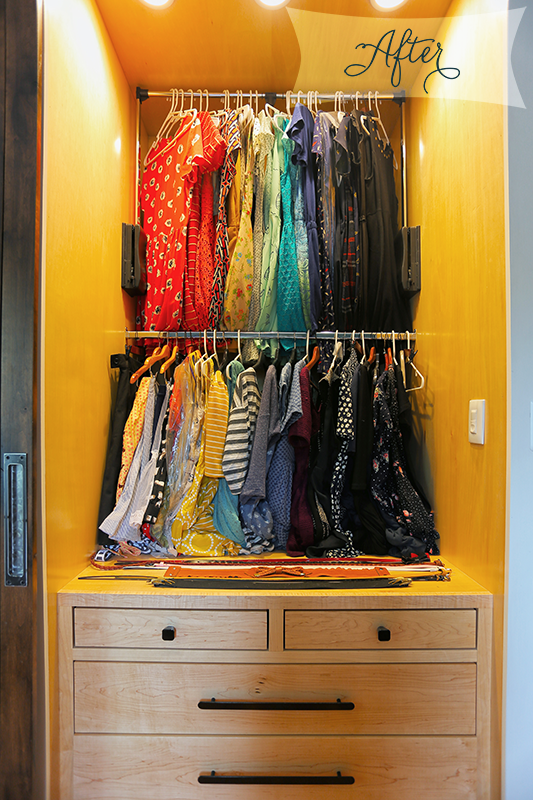
We used the same taupe color for all the trim in the apartment, and went for a sunny yellow as the closet interior color. We wanted something that wasn’t white or beige, but wouldn’t dramatically alter the look of our clothing.

Next up was the PTAC! That’s a “packaged terminal air conditioner” for those who haven’t been speaking renovation for 8 months now. They’re the giant units you see in old hotels, and they’re required by our building. The first step was to open up a gaping hole in the side of the brick-and-concrete building.

Then comes a wall sleeve, an exterior grille, and finally the air conditioning unit and cover. They also realized halfway through that they had to switch out the regular 120v outlet for a monster 240v outlet (which delayed us a few days, since all the electric had already been done and the walls were all closed back up already).

We also had to move and cover the building’s heating coils. Although the PTAC serves as a heater, the building heat is free (or at least already paid for by our maintenance)– it’s also terribly ugly. First the building wanted the coils to be placed on the top of the unit, then the bottom, then the top. I’m still not convinced that it matters or that they know what they’re talking about.

And lastly, they had to install one large pane of glass where the old window and old A/C used to be. This made the room look about 16x bigger and brighter.

So here you have the room as complete as the construction crew would make it, but without functioning floors.

The next step was to get some carpet installed. This was a much bigger headache than we anticipated. Note: If you don’t care about carpet and/or don’t enjoy rants, just scroll on down.

Originally, we just stopped into good ol’ Home Depot. Obviously, their carpet isn’t the best quality I’m going to find in the whole city, but I figured it would be quick and cheap. And considering how much I care about carpet, that sounded about right. The people at the store were complete morons. One girl had a “I’m New!” button on her smock, and an older man who followed her around later admitted she was training him. Neither of them could figure out the computer system. Eventually, we got a quote of around $1100-1200 for our 200 sq ft room. We decided to go for it.

The guys came to measure and we were emailed a new quote. There were over $200 in hidden fees! There was a “Hard Access Walk Up Fee (For hard to maneuver staircases and landings) or elevator access“– a fee for elevator access?? They should give us a convenience discount for being in one of the few non-walk up buildings in Midtown! How can you charge someone $150 due to the fact that they have an elevator? You know what it is? A NYC surcharge. And that’s BS, coming from a store that has not one but two locations in the city. Build the price into the installation or the carpet, but don’t charge a hidden fee! The other fee was to provide a certificate of insurance to our building, a $75 charge that wasn’t mentioned no matter how many times we said “we live in a co-op, can you guys provide insurance? Is there a charge for that?”– nobody knows until you pay the $50 measuring fee and then they tell you about all the rest of the fees. I didn’t even mention the “measuring fee” before, did I? Well you know what? Even if HD is the cheapest carpet in the city I don’t do business with disingenuous companies. Nor do I want someone with an “I’m New!” badge installing our flooring.

I momentarily pondered calling Empire, but a quick Google search was pretty quick to convince me they would be even worse. A friend in the design world insisted we try ABC Carpet, but the upstairs was out of our price range and the bargain basement didn’t have any remnants that would come close to fitting. We’re also pretty picky when it comes to color/softness/thickness and everything we liked was way out of our budget.

Finally, I checked Yelp, which led me to a store I’d never heard of on the Upper West Side, Rose’s Carpet. We spent a Saturday morning during a major heatwave trekking up there and managed to pick a recycled nylon that was fine. Not great, but decent. And the price was right– just slightly higher than Home Depot but with people who seemed to know what they were doing and had been doing it for awhile.

Five days later, the installers arrived at our door. They did everything they were supposed to do and seemed to know what was going on. I watched them roll out the carpet because I was anxious to see how the color played off our blue walls and taupe molding. I don’t think they’ve ever seen someone so anxious about carpet before.

They aligned it… unrolled…… evened out the edge………. kept unrolling……………. crap.

It was too short. Apparently, Rose’s sent in an order for 22′, and for some reason the manufacturer only sent 18′. Normally, it would be no problem. Come back next week with new carpet– whatever. But keep in mind that we have been living without a bedroom for a month now. And we both work from home (we had both been using the couch as our office, which was placed next to the bed in the middle of the living room). We had been keeping some errant furniture and the suitcases we’ve lived out of for the past 3 months in there, but got it all moved into the living room before the guys got here. Now we have spike strips on the floor and literally everything we own is in our 200 sq ft living room.

After some major complaining, we managed to get $100 off the price, and the guys came back 4 days later with the correct carpet. It took them about an hour and, at this moment, our renovation was finally over. No more contractors, no more so-called professionals. Just us, in our apartment, ready to DIY some last-minute projects and unpack.

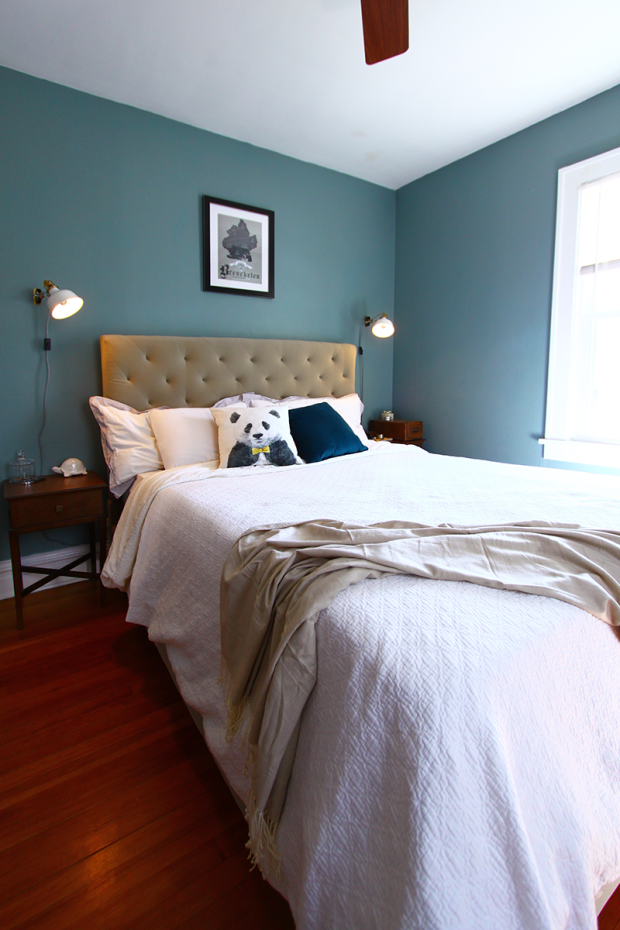
We danced and cheered for about 10 minutes and then got moving with the furniture. I couldn’t WAIT to get it out of my living room, once and for all. An hour later, we had this… definitely not finished, but a functional office and bedroom space.

That armoire in the last picture and the bedside table above it are antiques I turned into DIY projects I did about a year ago. They never made their way into our living space before, so finally having them with our things on top of them was such a breath of fresh air. I’ll have a post soon on where they started and the whole transformation process.

Room Details:

• PTAC – by Amana, from Total Home Supply, $800

• Closet Interiors – by Elfa, from the Container Store, $800

• PaintWalls: Behr UL-220-15 Frozen Pond, flat finish. Trim: Behr 720D-4 Ashwood, eggshell finish. Closets: Behr 390B-4 Chilled Lemonade, flat finish.

• Carpet – Sandy Hollow by Shaw in #103 Mountain Mist from Rose’s Carpet on the Upper West Side, $1500

Things I’d Do Differently (or Keep the Same):

So far so good, in here. I’d like to say I would have scrapped the carpet thing, but I don’t think M would have let me. It was a total pain, but at the end of the day he was right that it feels more homey and bedroom-y. The carpet we ended up with is perfect. We were worried it would look weird or dirty in the room, but it plays pretty well with the other elements, and it’s not super boring beige which is important (if you can’t tell the exact color from the photos, it’s like a dark sandy color with a lot of gray. I know, I know, sounds like beige, but it’s not!). Obviously, If I did this again, I’d already have the carpet figured out by the time we were almost done so they could just come in and do it instead of waiting a month.

I love our new closets, too. Believe it or not, this is the first time in my life I’ve had my own closet. As a kid, my parents divided their second bedroom into an office for my dad and a bedroom for me. I got the half with the windows, he got the half with the closets. In every place I’ve lived since then, there has only been one bedroom closet and Mike and I have shared it, or I’ve just used the drawers under our bed. Now that I have one, I actually don’t even know what to put in it. But I’m sure I’ll figure it out 🙂

So yay! I slept in a bed last night! With a frame under it! And woke up surrounded by bedroom furniture, not boxes and the couch.

Now I’ve got a lot of unpacking to do. And I couldn’t be happier about it.

Cheers!